Use a Switch Pro Controller with Dolphin Emulator on macOS Ventura
Step 1: Connect the controller to the Mac #
Using a Nintendo Switch Pro Controller on a Mac requires macOS Ventura.
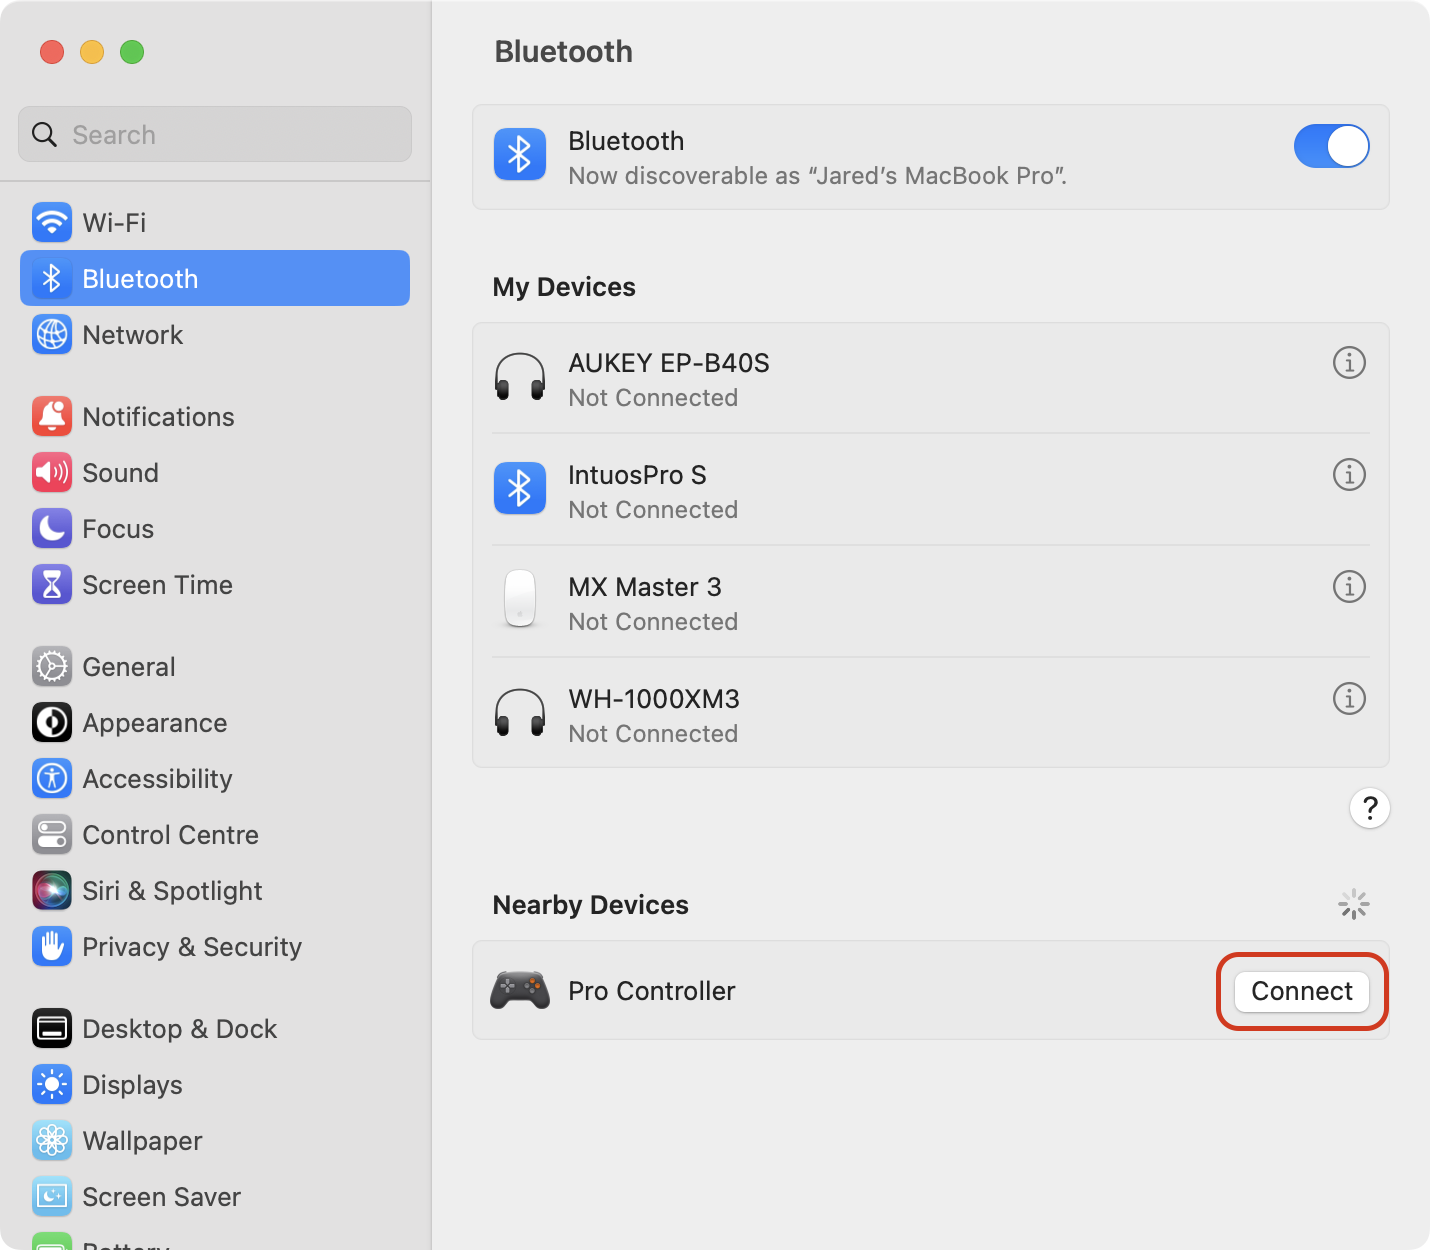
- Open System Settings ▶︎ Bluetooth
- Hold down the SYNC button on the top of the controller next to the USB port and wait for the LEDs at the bottom of the controller to light back and forth
- Click Connect next to ‘Pro Controller’ under ‘Nearby Devices’

Step 2: Set up the controller in Dolphin #
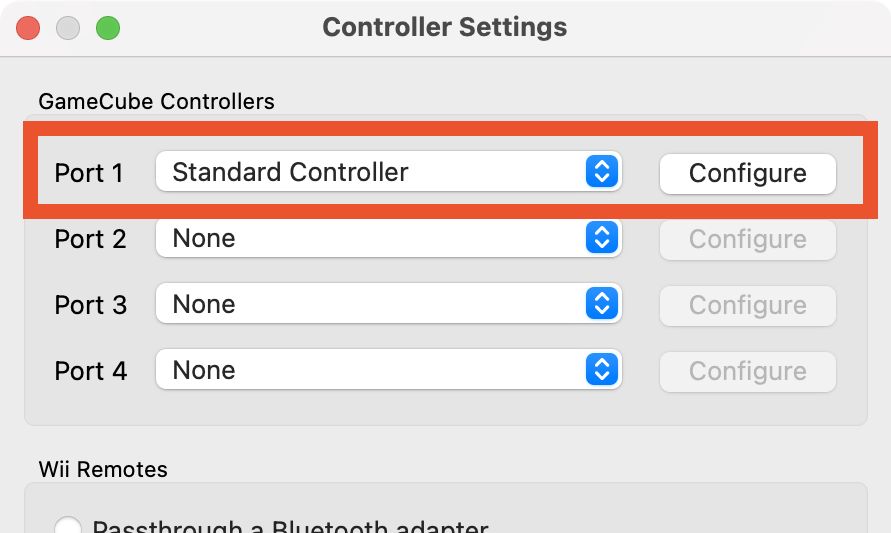
- Open Dolphin and click on Controllers
- Choose ‘Standard Controller’ in the port you want to configure

If you’d like to use my recommended settings:
- Download switch_pro_controller.ini
- Move it to
~/Library/Application Support/Dolphin/Config/Profiles/GCPad/Switch Pro Controller.ini. This can be done in Terminal like so
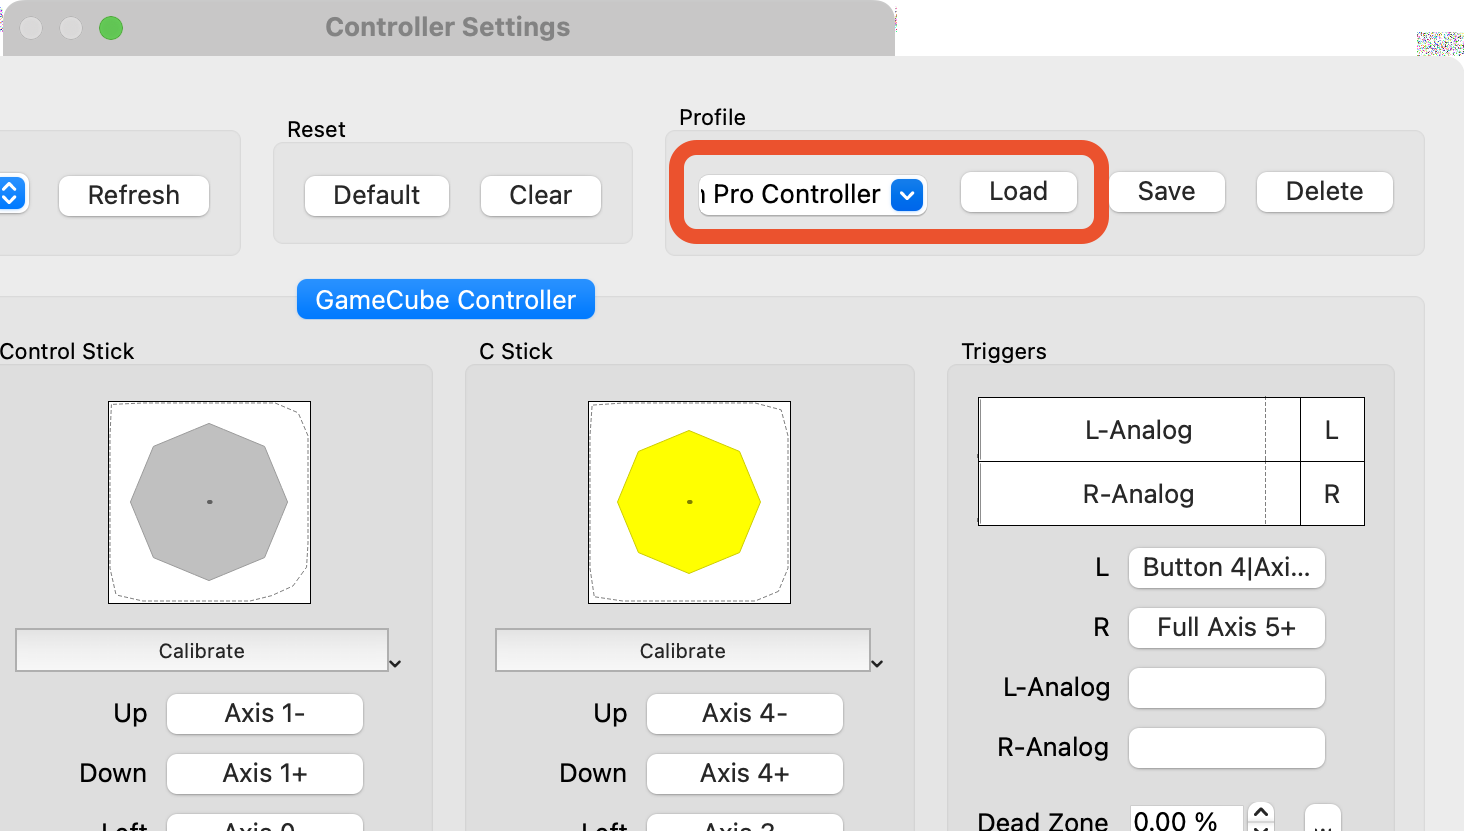
mkdir -p ~/Library/"Application Support"/Dolphin/Config/Profiles/GCPad && \ mv ~/Downloads/switch_pro_controller.ini \ ~/Library/"Application Support"/Dolphin/Config/Profiles/GCPad/"Switch Pro Controller.ini" - Now, in Dolphin, press the Configure button
- In the profile dropdown, choose ‘Switch Pro Controller’ and press Load. The buttons should be populated with my recommended settings and you can adjust them from there
- If you are configuring multiple controllers, make sure that the device in the top left is the one you want to be configuring
- For comfort and consistency with the GameCube controller layout, I’ve set:
- ZR on the Pro Controller to be R on the emulated GameCube controller
- and R on the Pro Controller to be Z on the emulated GameCube controller

If you want to configure the controller yourself:
- Press Configure
- Select ‘SDL/0/Pro Controller’ in the dropdown that appears (the number might differ)
- Go through each button, clicking on the blank box and then pressing the button on the controller that you want to use
- For Control Stick ▶︎ Up, for example, simply push the left stick on the Pro Controller upwards, and Dolphin will figure out the axis that you mean
- After setting up the sticks, you may wish to Calibrate them by pressing Calibrate and moving the sticks in the widest possible circle quite slowly
- If you want to clear or add alternative inputs to any of the configured buttons, right click on the configured button. This also gives you a live view of all the channels of the connected controller so you can decide on your preferred configuration
That’s it. The controller should now function as an emulated GameCube controller in the slot that you chose.